If you’re like me, your nails are looking a little, ahem, rough right now. Your gel is cracking off, whatever polish you had on is barely recognisable, and your cuticles are *begging* for some love. Basically, you need to go to the salon but, alas, you cannot since we’re all #stayinginside. And you know what? That’s okay, because I’ve talked with expert manicurist and nail artist Molly Romah for allll the tips and tricks you need to nail the perfect manicure at home. Follow the 10 simple steps below and before you know it, you’ll have mastered the perfect DIY mani. (Yes, it’ll even look good enough to post on your Insta grid.)
Step One: Grab your tools.
It’s pretty important to grab the right tools before you dive into all the fun trimming and painting parts of the mani. Romah suggests the following:
- nail polish remover
- nail clippers
- a cuticle pusher
- a file
- a buffer
- cuticle softener
- an exfoliating scrub
- lotion
- a base coat
- a top coat
- nail colour (s) of your choice
Once you’ve raided your medicine cabinet for these gadgets, you’re ready to go!
Step Two: Remove Your Current Polish
Use a cotton ball soaked in nail polish remover to gently wipe away your old colour. When it comes to what kind formula to choose, Romah says to pick one that’s non-acetone. “Acetone is a powerful solvent that removes nail polish quickly and easy, but can be drying to the cuticles,” she says. Instead, try a more hydrating option which is free of parabens, talc, and fragrance.
Step Three: Soak
Romah says that before you do any kind of work on your nails, it’s important to let them soak in a bowl of warm water with salt. Doing this helps your nail beds soften so that they can be more easily manipulated. If you’re looking to make this part a little more ~relaxing~, try adding a few drops of essential oils into the mixture for a super calming scent. According to Romah, you should let your hands stay in the water for about 10 minutes before patting them dry and rubbing a bit of cuticle softener onto your fingers.
Step Four: Tend To Your Nails
So you’ve let your nails soak, now it’s time to do a little shaping and trimming. Rather than trying to cut your nails into a shape, Romah says to cut your nails to the desired length (make sure they’re not too short!) and then use your file to shape your nails. Bonus: Filing will also smooth out any jagged edges you made by cutting with nail clippers.
Step Five: Use A Buffer
Next, grab your buffer. Drag it in a back-and-forth motion across the tops of your nails to even out any leftover rough surfaces. “It’s important to always use a super-fine-grit nail buffer to lightly smooth the ridges,” says Romah. “It helps the polish stay on longer.” Another pro-tip? Never use a really coarse nail buffer on your natural nails. According to Romah, it can ruin them by taking away too many of their layers which, while it may feel smooth, it actually does more harm than good.
Step Six: Push Back Your Cuticles
“Once cuticles have softened, wipe away any leftover cream with a cotton towel and begin pushing them back with a cuticle pusher or wooden stick,” says Romah. You can also try cutting your own cuticles if you’ve got a trimmer handy. That said, sometimes trying to remove your own cuticles can lead to small cuts and overexposed skin. If you don’t feel like enough of a pro to do this, simply pushing them back is definitely good enough.
Step Seven: Exfoliate
While this step isn’t necessary, it’s beneficial to give your hands a little bit of love by adding some exfoliation to your mani routine. Romah says that exfoliating can get rid of any dry, dull skin that might be lingering on your hands, leaving them super soft and smooth. However, she explains that you shouldn’t exfoliate everyday (it could lead to irritation), but that roughly three times per week is ideal depending on your skin’s moisture levels.
Step Eight: Moisturise
Romah says to always immediately follow any kind of exfoliation with a dollop of moisturiser. Not only does this help you avoid dryness, but it’s also a time for you to give yourself a little hand massage, relax, and breathe. Make sure you get in-between each finger and on every lil’ knuckle.
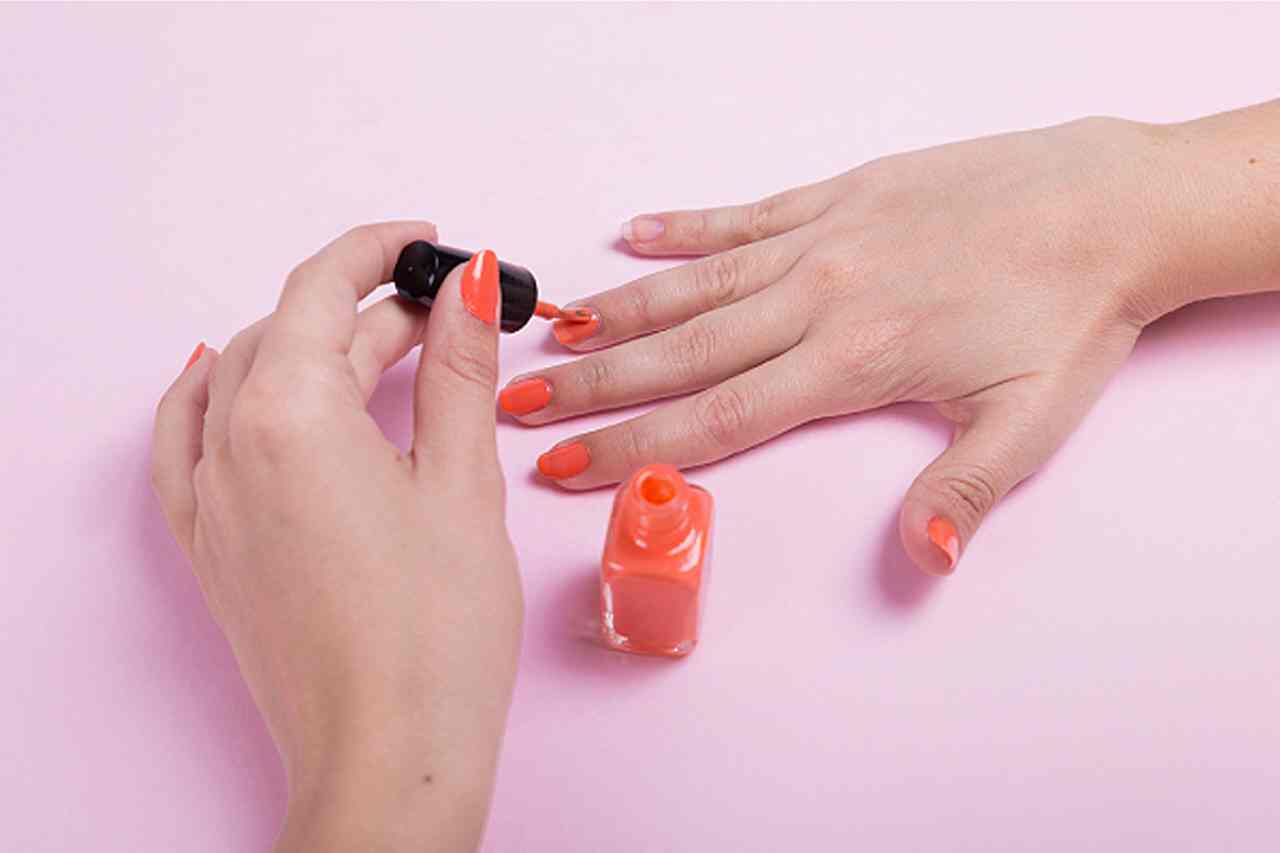
Step Nine: Apply Your Polish
Finally you’re at the most ~creative~ (and arguably the hardest) part of your DIY manicure: applying your nail polish. That said, Romah has a bunch of tips for making the process easier. Start by applying a thin base coat. Doing this protects your nails from becoming stained by any colour you use and also allows for a cleaner-looking final product.
Then go in with your colour of choice and apply a line across the tip of your nail. Next, add a dot near the nail’s base and push the dot down near the cuticle. Swoop your brush toward the outer rims, following the natural curve of the nail to make sure you hit all its edges.
After this, continue to sweep upwards toward the tip of the nail until you’re satisfied with the polish’s coverage. Paint each finger and follow with a top coat. Even though it may not seem essential, Romah says that applying a top coat seals in the coloured polish and leaves it with a shiny, glossy finish.
Step Ten: Clean Any Smudges
Yay, you’re almost done with your at-home mani. Let your nails sit until they’ve completely dried (bonus if you’ve got a fan). Once they’re ready, take a cotton bud soaked in nail polish remover and swipe around the edges of your nail bed. After you’ve erased your mistakes, voila! It’s time to admire your nails. Find some good lighting and snap pic for your feed! You deserve it.
This article was originally published on Fitness Advice.